Royal Icing Recipe
This is the only royal icing recipe you will ever need! It’s made with just a few simple ingredients, comes together quickly, and always turns out perfect.

Several years ago I shared my easy sugar cookie icing and it’s become a huge reader favorite – especially this time of year. Since then, I’ve had several requests for a royal icing recipe that wasn’t too difficult. So today I’m sharing my favorite royal icing recipe!
This recipe uses just five ingredients (no raw egg whites!) and is practically fool-proof. It does take a little longer to mix together, but it’s still easy to whip up.
Whether you’re new to cookie decorating or you’ve been decorating cookies for years, this is one recipe you will want to save. This post covers everything you need to know – from all of the different royal icing consistencies to my favorite cookie decorating tools and even how to decorate your cookies too!
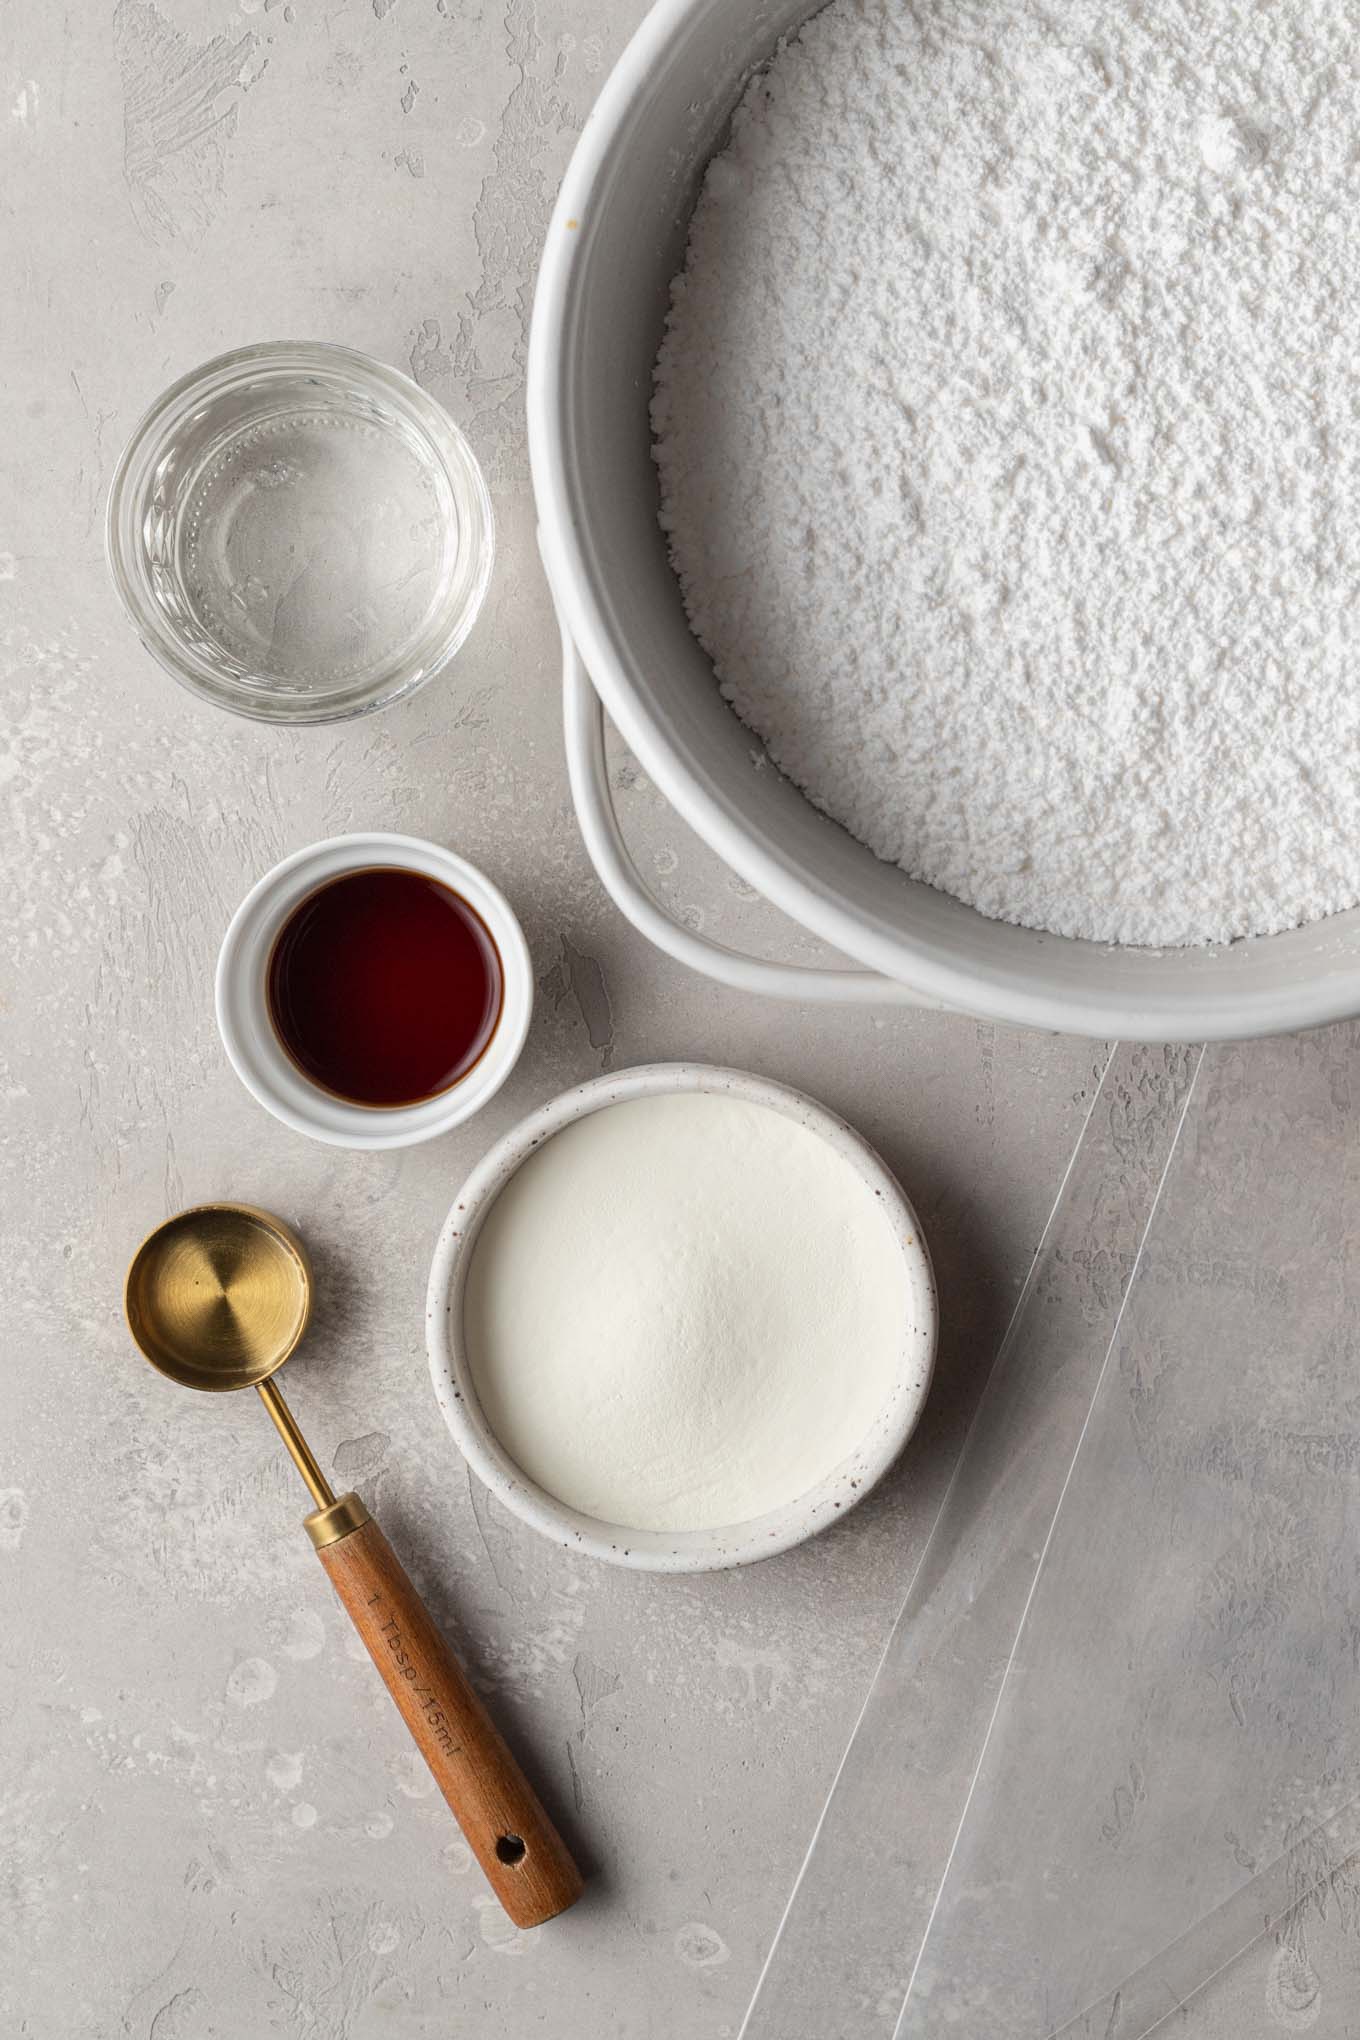
Ingredients You Will Need
- Powdered Sugar: You’ll be using 4 cups of powdered sugar to make this recipe. This is what sweetens and thickens the icing.
- Meringue Powder: Meringue powder is a dry powder made primarily of pasteurized egg whites and eliminates the need to use raw egg whites. I personally prefer to use it because it’s easier, has a long shelf life, and it works just as good as the real deal. My personal favorite brand of meringue powder is Wilton.
- Water: To help the icing come together and thin it out. I recommend using warm water for best results.
- Corn Syrup: One tablespoon of light corn syrup helps to create a softer bite and prevent your icing from being super crunchy.
- Vanilla Extract: I typically use pure vanilla extract, but clear vanilla extract works just fine too. If you want to use a different kind of flavoring, just make sure it doesn’t have oil listed as an ingredient because it will break down the icing.
- Food Coloring: I highly recommend using gel food color because a little bit goes a long way. AmeriColor and Wilton are my two personal favorite brands of gel food coloring. Liquid food coloring will work, just keep in mind that if you use too much it can thin out the icing.

My Favorite Tools For Decorating Cookies
When it comes to decorating cookies, you really don’t need anything super fancy. Here are a few of my favorite tools to have on hand though:
- Piping bags: I typically use the 12-inch Wilton piping bags.
- Couplers: These aren’t required, but they will make your life a lot easier if you want to swap out the same piping tip for different colors or use different piping tips for the same color. I use these plastic couplers and they work great!
- Piping Tips: You can technically snip the end off of your piping bag and use that to pipe your icing. However, small round piping tips will make it much easier. The Wilton #3 round piping tip is my personal favorite, it’s great for outlining and flooding your cookies all at once. Wilton #4 is another great option! If you want some smaller round tips for more detailed work, I recommend Wilton’s #1 (the smallest) and #2.
- Toothpicks: These are great for moving the flood icing around to fill in any empty spots.
- Cookies: To decorate, of course! My regular cut-out sugar cookies are what I prefer to use. But you could use my cut-out pumpkin cookies, gingerbread cookies, or chocolate cookies instead.


How to Make Royal Icing
First things first, you will need either a handheld mixer or a stand mixer fitted with the whisk attachment. Make sure that your bowl is clean and completely grease-free too, otherwise your icing won’t set up properly.
To make the royal icing, add your powdered sugar and meringue powder to your mixing bowl (or the bowl of your stand mixer) and mix them together.
Then, add your warm water and continue mixing on low speed until the mixture is well combined.

Stop and scrape down the sides of your bowl, then mix in the corn syrup and vanilla extract on low speed.
Once everything is fully combined, increase the speed to medium and continue mixing until the icing reaches stiff peaks or your desired consistency. If you’re not sure what consistency is best, don’t worry! I’ll explain everything you need to know about the different consistencies below.

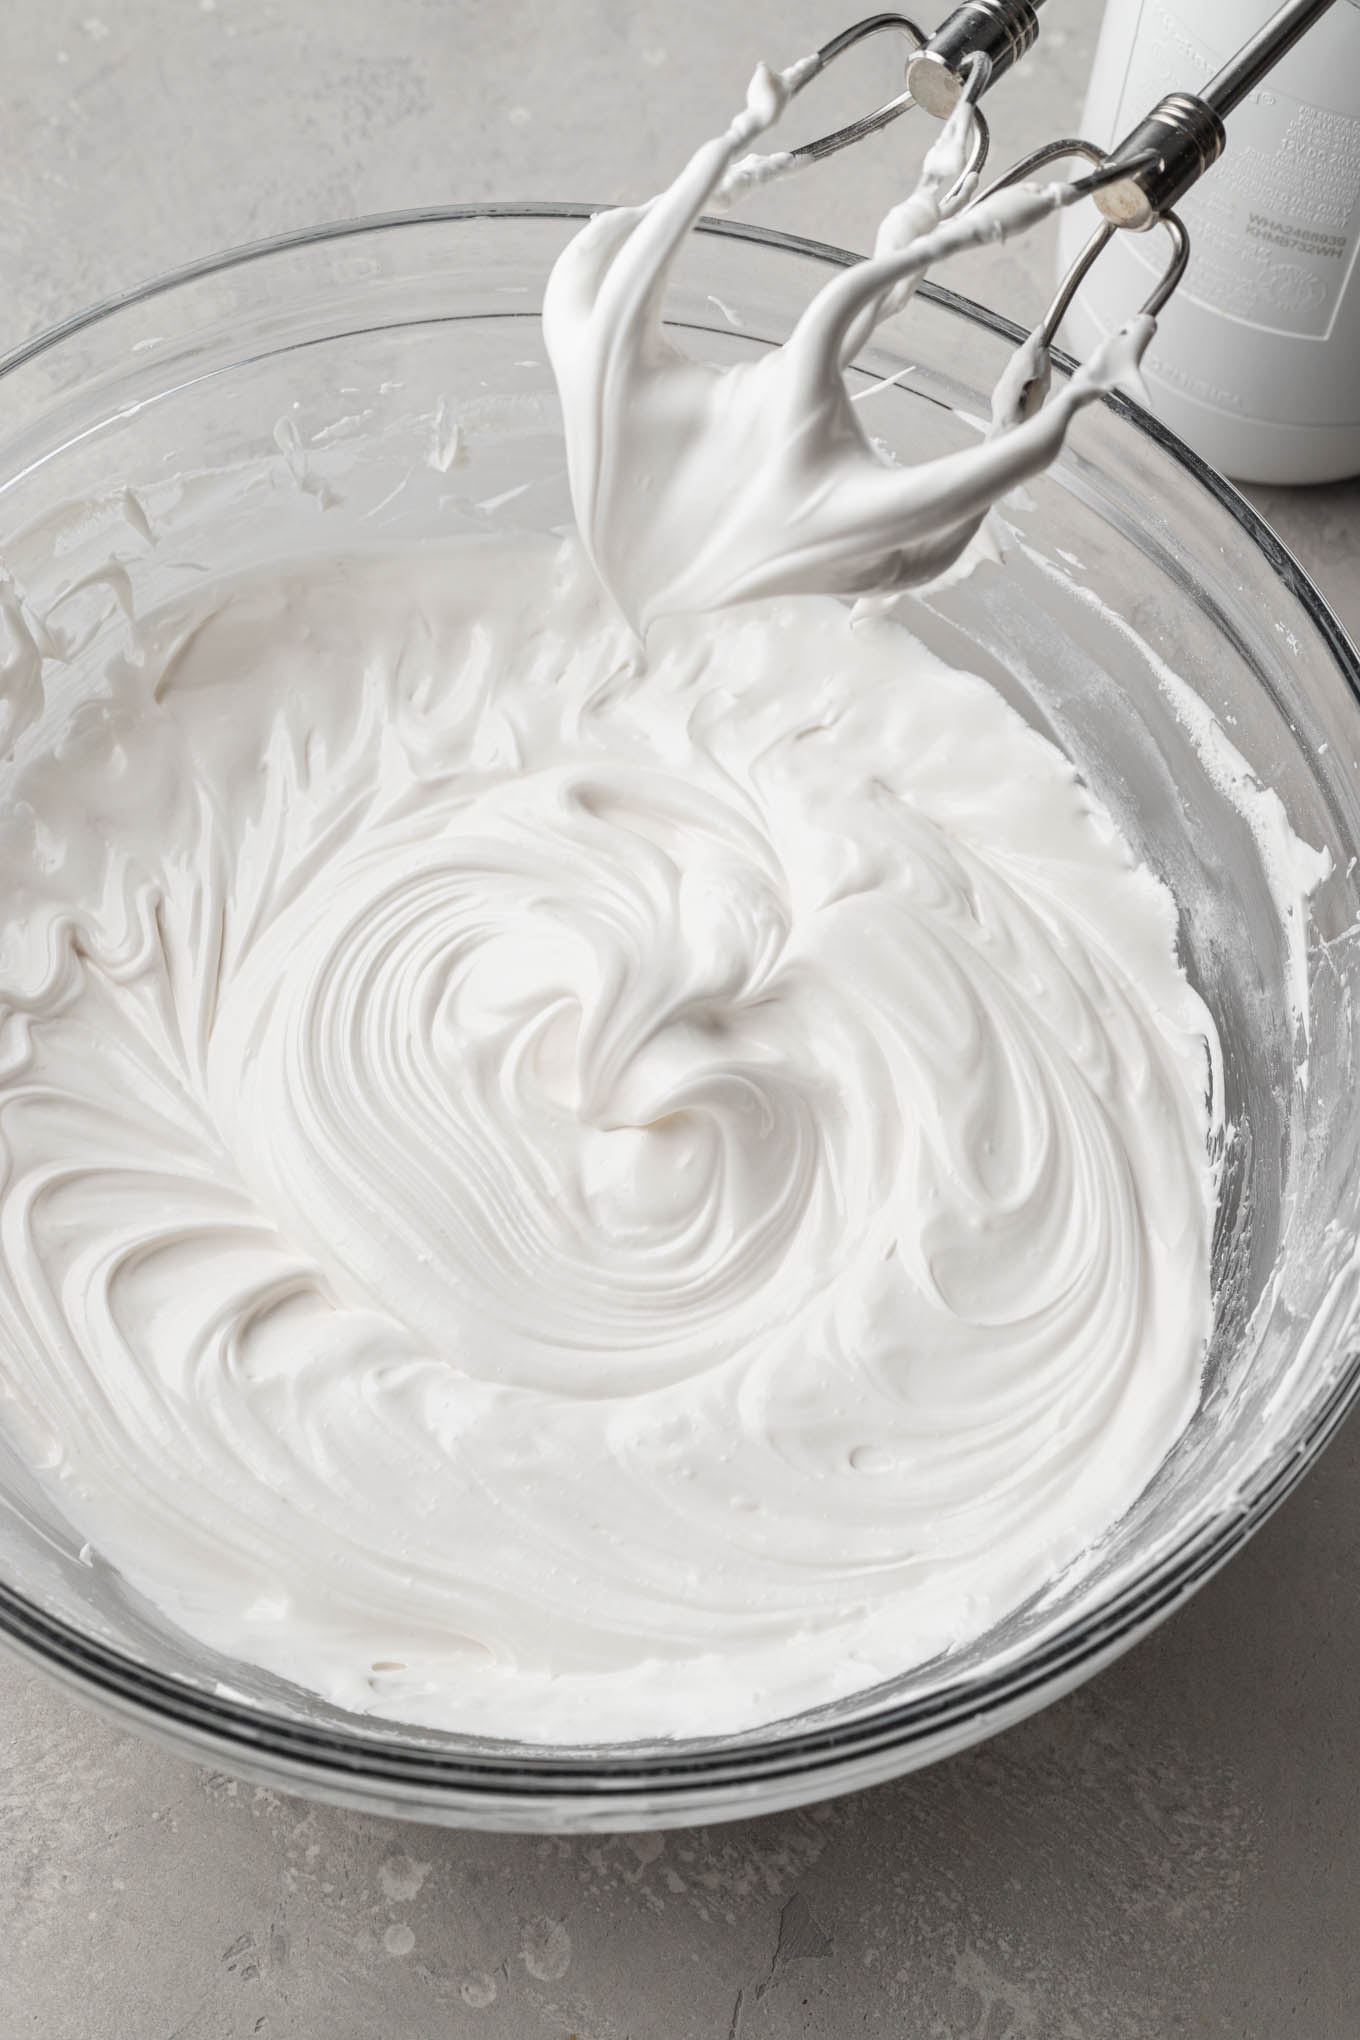


Royal Icing Consistencies
- Stiff: The consistency of stiff icing is similar to buttercream frosting and will hold stiff peaks. It’s perfect for piping more detailed work like leaves, roses, or flowers or things that need to be upright (like a gingerbread house). It can take up to 10 to 12 minutes with a handheld mixer to reach this consistency, so be patient!
- Outline: The consistency is a little softer than stiff icing and will hold soft peaks. It’s perfect for outlining your cookies or piping words onto them.
- Medium (15 second-icing): This is my personal favorite because it’s thick enough to outline the cookies, but thin enough to flood the cookies too. If you don’t want to do anything too intricate, this consistency allows you to do everything all at once! The best way to tell if your icing is medium consistency is to lift up your spoon and allow some of it to drizzle back into the bowl. It should take about 15 seconds for the icing to fully dissolve back into the bowl of icing.
- Flood: The consistency of this one is thinner and perfect for flooding the inside of the outline icing. When you lift your spoon up, the icing should drizzle off and take about 8 seconds to fully dissolve back into the bowl of icing.
What do you do if you need more than one consistency of icing? I recommend beating the icing to the thickest consistency that you need, dividing it up between different bowls, and thinning each color with a little warm water to the right consistency.


Coloring & Preparing The Icing
If you plan to only use one color, go ahead and mix it in with your stand mixer or handheld mixer. If you are using several different colors, then divide the icing between several different bowls and add your food coloring to each one.
If you beat the icing to a medium consistency, you do not need to divide the colored icing between two different bowls because you will be using the same icing to outline and flood the cookies.
If you beat the icing to a stiffer consistency and need to thin some of it out, divide the colored icing between two bowls. You won’t need as much icing to outline the cookies, so I recommend putting more icing in the bowl that will be the flood icing.
Add a little bit of water to each bowl of icing until it’s the right consistency. I recommend only adding about ¼ to ½ teaspoon of water at a time, but this will also depend on the amount of icing in your bowl. You can also use a spray bottle filled with water to spritz the icing and thin it out.

How To Decorate Your Cookies
Once you’ve colored all of your icing, add each one to a piping bag fitted with your preferred piping tip. As I mentioned earlier, if you need to swap out the piping tip or use different ones then couplers will make this process much easier!
Make sure to cover any icing that you are not actively using with a damp paper towel until you’re ready to use it, otherwise it can dry out and harden.
To decorate the cookies, start by outlining each one with the outline icing, then use the flood icing to fill in the middle of the cookie. If you’re using medium consistency icing, you can just do this all at once.

Then, use a toothpick to help move the flood icing around and fill in any empty spots. If the icing doesn’t look perfectly level, gently shake or tap your cookies to help flatten it out. If you’re adding sprinkles, go ahead and add them while the icing is still wet.
If you’re wanting to do wet-on-wet designs, you can go ahead and add your designs while the icing is still wet. This allows the colors to kind of meld together, similar to the turkey feathers you see on the turkey cookies in this post.
If you’re wanting to add designs on top of the icing, make sure to let the bottom layer of your royal icing harden for a few hours before adding more designs.
Allow the icing to dry on the cookies at room temperature for several hours or until it’s hard. I personally prefer to ice my cookies the night before and let them sit out overnight.

Frequently Asked Questions
Yes! Because this recipe is made with shelf-stable ingredients, it’s fine to store it at room temperature in an airtight container for up to 2 weeks.
If the icing is too soft, just mix it with an electric mixture until it’s thickened back up.
Of course! Any leftover icing can be frozen in freezer bags for up to 3 months. Make sure to press out as much air as possible before freezing it.
When you’re ready to use the icing, thaw it overnight in the fridge, then place it on the counter for a few hours to bring it to room temperature.
This kind of depends on a few factors – the size of the cookies, the amount of icing you used, or even how much airflow the cookies are getting. If you need to speed up the process, you can place a fan on the cookies or even use a heat gun.
As I mentioned earlier, I personally prefer to let my cookies sit out overnight so that the icing has fully hardened before I stack them. The iced cookies will not dry out either, I promise!
Air bubbles are usually caused by beating too much air into the icing. This can happen if you over mix the icing or mix it at too high of a speed.
That being said, don’t worry if you get some air bubbles! You can let the icing sit for 15 to 20 minutes (with a damp paper towel over it) to let the air bubbles come to the top, then smooth them out.

Recipe Tips
- If your powdered sugar is lumpy make sure to sift it first. This will ensure that your icing turns out nice and smooth.
- If you are working with multiple colors of icing, place a damp cloth on top of the bowl (or piping tips) to create a humid environment. This will prevent any of your icing from drying out.
- Avoid adding too much liquid food coloring or flavoring because it can thin out the icing.
- Once you mix the icing long enough, it should lighten in color and turn white. If you want your icing to be pure white, you can use clear vanilla extract or add some white gel food coloring.
- This recipe will yield about 3 cups of royal icing, which is enough to decorate two dozen 3-inch cookies or three dozen 2.5 inch cookies.
Royal Icing Video

Royal Icing Recipe
Ingredients
- 4 cups powdered sugar (480 grams)
- 3 tablespoons meringue powder (27 grams; I use Wilton)
- 6 tablespoons warm water plus more as needed to thin the icing
- 1 tablespoon light corn syrup optional but recommended
- 1 teaspoon pure vanilla extract
Instructions
- To prepare the icing: In the bowl of a stand mixer fitted with the whisk attachment, or in a large mixing bowl using a handheld mixer, add the powdered sugar and meringue powder. Stir until well combined.
- Add the water and continue mixing on low speed until fully combined and smooth. Stop and scrape down the sides of the bowl, then mix in the corn syrup and vanilla extract.
- Increase the speed to medium and continue mixing until the icing reaches stiff peaks or your desired consistency (see blog post for royal icing consistencies). If using a handheld mixer, it can take up to 12 minutes to reach stiff peaks, so be patient!
- To color the icing: If you are just using one color, then you can go ahead and add it to the bowl of icing and mix it in with your stand mixer/handheld mixer. If you are making several different colors of icing, divide the icing between several different bowls and add gel food coloring.
- To thin the icing: If you beat the icing to a medium consistency, there’s no need to divide the colored icing between two different bowls since you can use the same icing to outline and flood the cookies. If you beat the icing to a stiffer consistency and need to thin some of it out for flooding, divide the colored icing between two bowls. You won’t need as much icing to outline the cookies, so I recommend putting more icing in the bowl that will be the flood icing. Add small amounts of water to the flood icing bowl (¼ to ½ teaspoon at a time or spritz with a little water in a spray bottle) until the icing has reached a flood consistency. If the icing is too thick, you can add more water to thin it out. If it’s too thin, you can add a bit more powdered sugar to thicken it. Cover any icing that you are not using with a damp paper towel until you’re ready to use it. This will prevent the icing from hardening.
- To prepare your bag: Once all of the icing is colored and prepared, distribute it between piping bags with your desired piping tips. If you plan to swap out the same piping tip for different colors or use different piping tips for the same color, then I recommend using a coupler/couplers. It will make the process much easier!
- To decorate the cookies: Outline each cookie with the outline icing, then use the flood icing to fill in the middle of the cookie. (Note: If using medium consistency icing, you can do this all at once). Use a toothpick or scribe to move the icing around and fill in any empty spots. If needed, gently tap or shake the cookie to help the icing settle in a smooth layer. If adding any sprinkles, go ahead and add them as soon as you ice each cookie.
- Allow the cookies to dry at room temperature for several hours or until the icing has hardened. The amount of time this can take will vary depending on how large your cookies are, how much icing you’re using, and the amount of airflow. To be safe, I prefer to let my cookies dry overnight before stacking them.


